A few simple prep steps can make your printed sign cleaner, easier to read, and better protected outdoors.
This page contains affiliate links. We may earn a commission if you make a purchase.
Be sure to get permission before posting signs in public places.
Best outdoor setup: print on regular paper, trim it neatly, then cover it with clear packing tape or a self-adhesive laminating sheet. This helps protect the ink from rain, fingerprints, and wind-blown moisture.
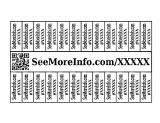
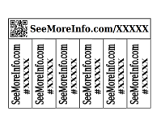
Add Ons for Store-Bought Signs
Add ons are meant to upgrade a sign you already have, like a For Sale, Garage Sale, Open House, Lost Pet, or Yard Sale sign.
Measure the spot where you want the add on to sit, then enter that width and height before printing.
Choose a design that fits the space. Long narrow spaces usually work best with the one-line options. Taller spaces look better with QR + website + listing number layouts.
Add ons are capped at 10.5" wide by 8" tall so they fit on normal letter paper with room for trimming.
After printing, trim around the add on, leaving a small white border if you want an easier taped edge.
For outdoor use, cover the whole add on with clear packing tape or laminating sheet, overlapping onto the original sign so water cannot easily get behind it.
Keep QR codes as flat and smooth as possible. Wrinkles, glossy glare, or tape bubbles can make scanning harder.
If you want a quick peel-and-stick option, printable
sticker paper works well indoors, but is less durable outdoors.
Full Sheet Signs
Full signs are best when you want SeeMoreInfo to be the main printed sign instead of an add-on to another sign.
Use heavier paper or cardstock if the sign will be handled, taped, or moved around.
Print at actual size when possible. Browser or printer scaling can slightly change the final layout.
For windows, tape from the inside when you can. It protects the sign and keeps the outside cleaner.
For outdoor posting, laminate the full sheet or cover the front with overlapping strips of clear packing tape.
Place the sign where someone can read the main message first, then scan the QR code or type the listing number.
2-Page Signs
These are for bigger visibility when one sheet of paper is not large enough.
Print both pages using the same printer settings so the two halves line up correctly.
Trim the inner overlap edge neatly. For SeeMoreInfo signs, trim the bottom edge where needed before joining.
Use a glue stick on the overlap area, align the two pages carefully, then press flat from the center outward.
Add tape on the back seam for strength, especially if the sign will be moved or handled.
For outdoor use, use oversized laminating sheets or cover the assembled sign with clear tape after the pages are joined.
Tear Tags
Tear tags work well when people may not want to scan right away but still need the listing number for later.
Trim the excess blank paper from the outside of the sign first.
Fold the tag row forward and backward a few times to weaken the paper before cutting between tags.
Cut carefully between each tag, stopping at the fold line so the tags stay attached until someone tears one off.
If you need more tabs, print a second copy and stack it behind the first one.
Glue or staple only the center/top area so the tabs still tear away cleanly.
For outdoor use, protect the main sign area, but avoid taping over the tear-off cuts.
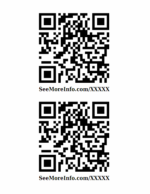
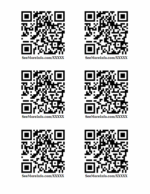
QR Only
QR-only prints are useful for windows, counters, flyers, bulletin boards, and anywhere the sign message is already obvious.
Use a larger QR code when people will scan from farther away.
Keep the QR code flat, clean, and high-contrast. Avoid placing it over folds, seams, or textured surfaces.
When taping over a QR code, smooth the tape slowly to avoid bubbles through the code area.
Test-scan it with your phone's camera before posting it outside or handing it out.
Weatherproofing
Regular printer paper is obviously not waterproof, but it can hold up much better with a little protection.
Clear packing tape works well for small add-ons and QR labels. Overlap the tape slightly so water has fewer paths in.
Self-adhesive laminating sheets are easier for full-page signs and usually look cleaner than several strips of tape.
Press from the center outward to push out air bubbles before sealing the edges.
Leave a small sealed border around the paper whenever possible.
Printable sticker paper can be convenient indoors, but for outdoor signs, regular paper plus tape or laminating is usually the safer choice.
Outdoor conditions vary. Sun, rain, humidity, and heat can all shorten the life of printed paper signs, so check them occasionally and replace them if they start to fade, curl, or peel.